Written by
Mandriola
WP_Post Object
(
[ID] => 4698
[post_author] => 5
[post_date] => 2023-12-12 14:16:06
[post_date_gmt] => 2023-12-12 14:16:06
[post_content] =>
[post_title] => 7 tips for reusing bottle corks
[post_excerpt] =>
[post_status] => publish
[comment_status] => closed
[ping_status] => open
[post_password] =>
[post_name] => 7-tips-for-reusing-bottle-corks
[to_ping] =>
[pinged] =>
[post_modified] => 2023-12-19 15:33:04
[post_modified_gmt] => 2023-12-19 15:33:04
[post_content_filtered] =>
[post_parent] => 0
[guid] => https://mandrioladelisboa.pt/?p=4698
[menu_order] => 0
[post_type] => post
[post_mime_type] =>
[comment_count] => 0
[filter] => raw
)
1Array
(
[cover] =>
[post_author] => Mandriola
[article_text_1] => Discover how to reuse bottle corks with these 7 creative and sustainable tips
Do you have bottle corks scattered around the kitchen waiting for a second life? Follow these tips to reuse them. They are simple, practical ideas, and the result will be surprising – who knows, they might even make a special Christmas gift?
1. Transform old corks into a corkboard
Cork, the main material in most cork stoppers, is an exceptional material. It’s used in bottles, in the manufacture of shoes and even to seal off space capsules. To start, you should try something a bit simpler: an original corkboard where you can pin reminders, photos, or cards. Follow these steps.
Materials
– Empty frame.
– Used bottle corks.
– Super Glue.
– Scissors and X-acto knife.
– Paint (if you want to customize the corks).
Steps
1 – Remove the glass and the back of the frame, leaving only the empty outline.
2 – Arrange the corks in the frame to get an idea of how you want them placed. Try placing them in uniform lines, specific patterns, or in a more random fashion. And, of course, don’t forget to clean the corks beforehand if they are dirty or have wine residues.
3 – If necessary, cut the corks to fit better into the available space within the frame.
4 – Use hot glue to secure the corks to the frame. Apply the glue to the back of each cork and press it firmly onto the frame. Make sure they are securely attached.
5 – Adjust as needed to ensure the corks are aligned as you imagined. Let the glue dry completely before continuing.
6 – If you like, paint the corks with acrylic paint to add a touch of color. Once the paint has dried completely, the corkboard is ready to use.
2. Create plant pots with old corks
The corks that would end up in the trash can be used to create unique plant pots, decorating spaces in an interesting way and bringing nature indoors. Take note.
Materials
– Square-shaped glass pots.
– Used bottle corks.
– X-acto knife.
– Super Glue.
Steps
1- Separate the corks that will be needed to cover the chosen pot. If necessary, cut some parts to ensure there are no irregularities on the surface.
2 – Turn the pot upside down and start gluing the corks onto the bottom. If needed, cut again to ensure the piece has straight and symmetrical edges.
3 – Start gluing the corks onto the sides of the pot, placing some vertically and others horizontally.
4 – To finish, glue all the corks together. Leave to dry completely and you’re done! Now all you must do is fill them with water and put in your favorite flowers or plants.
3. Customize your own stamps
Custom stamps are a fun way to add a unique touch to your notebooks, journal, notes, or agenda. Try creating different designs and patterns. Here’s a suggestion for you.
Materials
– Used bottle corks.
– X-acto knife.
– Stamp ink.
– Ink pad.
– Paper or cardstock for testing.
Setps
1 – Start by cutting between 1 and 2 millimeters from the top or bottom of the cork.
2 – Using the X-acto knife, carefully carve the desired design into the cork slice. To make it easier, you can sketch the design on the cork first and then guide the X-acto knife along the outlines. If you feel confident, you can venture into more complex shapes.
3 – Next, it’s time to attach the drawn figures to the cork. Apply glue to the shape and press for a few seconds.
4 – For better results, remove any imperfections left from excess glue or cork irregularities.
5 – Do some tests on paper or cardboard to make sure the stamp is creating the desired design.
4. Create decorations for the dining table
Do you want to add more charm to your dining table? Here’s a sustainable and creative way to do it.
Materials
– Used bottle corks.
– Hot glue.
– X-acto knife.
– Additional decorative elements of your choice.
– Wooden base or cardboard (optional).
– Paint (optional).
Steps
1 – Decide which piece you want to create for the table. It could be a napkin holder, a card holder, a set of glasses or other decorative elements.
2 – If you choose to make a larger piece, it can be helpful to have a base. Use a wooden board or cardboard to arrange the corks.
3 – Arrange the corks on the base according to the design you want. It could be a row of corks for card holders or a more complex arrangement for a centerpiece.
4 – Use hot glue to fix the corks to the base. Press each cork firmly to ensure a strong adhesion.
5 – Add extra decorative elements, such as ribbons or other accessories, to make the piece more personalized. For example, during Christmas, you can incorporate festive elements.
6 – If you wish, paint the corks with acrylic paint to add color to the project. Leave to dry completely and it’s ready to use.
5. Make your Christmas decoration even more special
Why not reuse bottle stoppers to create Christmas decorations? Bells, trees or ornaments are excellent alternatives. Here’s a suggestion for a unique and sustainable bell.
Materials
– Used bottle corks.
– Acrylic paint in desired colors (traditionally red, green, and gold).
– Jute twine.
– Hot glue.
– Christmas-themed felt or fabric.
– X-acto knife.
– Optional decorations (such as small pine branches, bows, etc.).
Steps
1 -After making sure the corks are clean and dry, paint them with the colors you want. Red, green and gold are the traditional choices, but you can experiment with other colors if you prefer. Leave them to dry completely.
2 – Stack 3 or more painted corks to form the body of the bell and glue them together using hot glue.
3 – Add details to the bell body, such as stripes or circles. Let it dry completely.
4 – Next, take an unpainted cork and cut it in half vertically. Paint it the color you want (it can be gold or silver). This piece will be the bell’s clapper.
5 – Glue the clapper piece to the bottom of the stack of corks with hot glue, ensuring it hangs in the center.
6 – Cut a piece of jute twine to create a hanging loop for the bell. Knot the ends of the string and glue it to the top of the bell.
7 – If you prefer, make a loop with the jute twine or ribbon and glue it to the top of the bell where the twine is attached.
8 – This step is optional but adds a more professional touch: cut a circle from Christmas-themed felt or fabric. Glue the bell on top to create a base.
9 – Finally, add any additional decorations you’d like, such as pine branches. It’s ready to be hung on the Christmas tree or any place you desire.
6. Personalize your refrigerator
This is another fun and eco-friendly way to add a handmade touch to your kitchen. Follow these steps to create refrigerator magnets from old corks.
Materials
– Used bottle corks.
– X-acto knife.
– Acrylic paint.
– Adhesive magnets.
– Hot glue.
– Decorative ribbons (optional).
– Permanent ink pen (optional).
Steps
1 – Cut the corks in half horizontally to create thin slices for easy attachment of the magnets.
2 – Paint the cut surfaces of the corks with acrylic paint. Choose vibrant colors or thematic patterns, depending on your preference or the season. Let the corks dry completely.
3 – Place adhesive magnets on the back of each cork. Position them in the center to ensure a strong grip on the surface of the fridge.
4 – You can go a step further and add drawings or personalized messages to the corks with a permanent ink pen. If you want to add more decorative elements, such as ribbons, use hot glue to attach them to the front of the corks.
5 – Once the paints and glues are completely dry, the magnets are ready to use.
Extra tip: Overlap several slices of cork to form a bunch of grapes. Finish with small vine branches and stick a magnet on the back to adhere it to the fridge. The ideal choice for Mandriola wine enthusiasts!
7. Make your own domino set
If you enjoy spending quality time with board games, you don’t need to buy this one. You can reuse bottle corks to make a domino set and give a new life to materials that might otherwise go to waste. Here’s a step-by-step guide.
Materials
– Used bottle corks.
– Permanent ink pen.
– X-acto knife.
– Wood paint (optional).
Steps
1 – With a X-acto knife, cut the bottle corks in half, horizontally, lengthways. The two halves of each cork will form a domino piece.
2 – Use a permanent ink pen to mark the dots on the ends of the cork pieces, from 0 to 6. Choose contrasting colors to ensure the dots are easily distinguishable.
3 – To ensure uniformity, use a ruler to maintain the same distance between the dots on all pieces.
4 – If you want to give the domino pieces a more durable touch, paint them with wood paint. Once dry, they are ready to use!
Mandriola, always there for the most pleasant moments
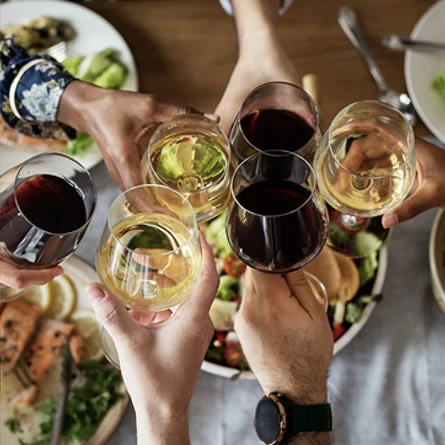
With these 7 tips for reusing bottle corks, you’re giving a second life to items that would otherwise be thrown away, adding a personal touch to your decor. And the fun is guaranteed. When you’ve finished your project, open a bottle of Mandriola to celebrate and, of course, save the cork for your next creation!
[seccao_slider] => Array
(
[slideshow] =>
)
[article_text_2] =>
[showmap] => Não
)
Share